Before we begin I need to explain the motivation behind this tutorial. First, I am not receiving any kind of endorsement or financial reward for publishing this. Second, I am not publishing this in order to sell data recovery software. In fact, this tutorial is actually based on a free open source data recovery tool that you can download and use yourself. I’ll share the link to it later in this article.
My main motivation for posting this tutorial online is to save you some time and money. There are far too many examples of people turning to data recovery labs for assistance only to get overcharged and essentially ripped off. In many cases, the recoveries could have been done free of charge, with free software programs in the comfort of your own home.
So, I would like you to view this tutorial as a preventative tool – one that gives you the knowledge to recover data on your own without having to spend thousands of dollars at a scam data recovery lab. The sad fact is, many non-tech savvy computer owners get taken advantage of on a daily basis. I want to do my part to try to stop that from happening.
The following tutorial is broken down into several steps. I have tried to explain each step as simple as possible to make it easy for anyone to do this kind of recovery. Plus, I have added several screenshots to show you exactly what you should see and look for with each and every step. So, let’s get started!
1. Preparation
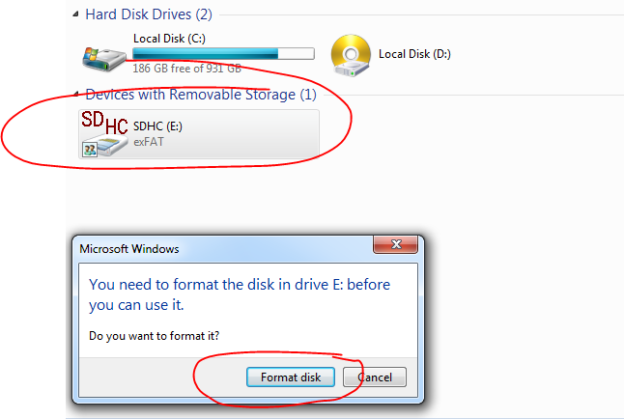
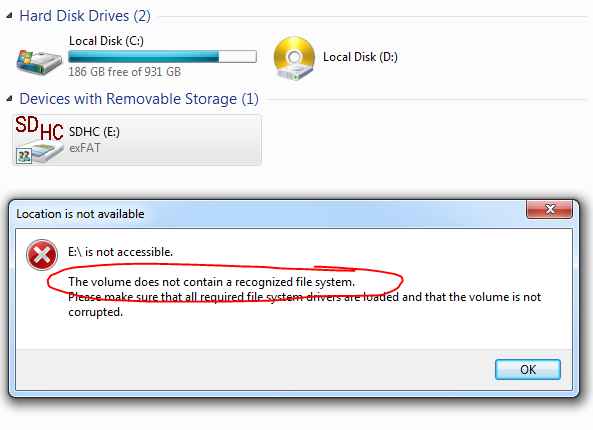
You have an SD Card that is showing RAW unrecognizable file system or your computer is telling you the card is in an inaccessible drive letter.
2. Test The SD Card & Download The Software
This is where you would do a little bit of simple “process of elimination.” What I mean by that is on the offhand chance your reader is faulty, then your SD Card is not. The way to determine this is to ‘test’ the SD Card in one or more different machines. Should each machine return the same error messages you will know for sure that the SD Card is giving you the problem.
Now that you know your SD card, in fact, corrupt, download the free recovery software I mentioned earlier. You can find it at: https://www.cgsecurity.org/wiki/TestDisk_Download. I will guide you through the entire process on how to use this software as the guide goes on.
Remember, this is a free program and should you end up liking how it works, you could always offer a donation of an amount of your choice in thanks. If this free program recovers your data, you will have saved yourself several hundred dollars in the process.
When you download the program, be sure to choose the version that matches your Operating System. After the download completes, extract the archive contents making sure to have it stored somewhere on your desktop for easy access. You can always move that folder somewhere else at a later time.
Open the extracted folder and inside of it, you will see the required executable program that you will have to RUN. As the program is portable, it does not require installation and that means it can also be used as LiveCD.
Open the folder and run this file: testdisk_win.exe
3. Run The Software & Welcome Command Prompt
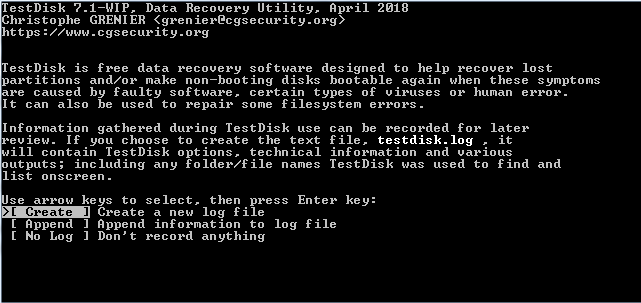
Once you’ve completed running the program, a screen will open featuring some commands. The options you will see include:
Create, Append or No Log.
Unless you are planning to log any of the recovery procedures, just select No Log and press Enter.
4. Media Type Selection
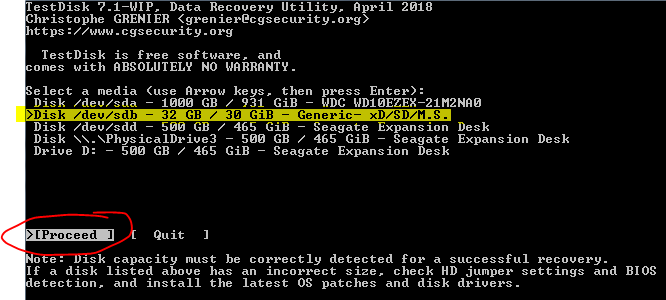
After you have made your selection, another screen will appear asking you to choose the media type. As we are going through the process to correct a corrupt SD Card we would select that media option. Once you locate the correct media type, select it and then press ENTER to continue.
5. Partitions
Your next screen is going to provide you with a list of partitions that the recovery software can search and work on. You will have to select the one that corresponds to your Operating System. If you are not sure, at the bottom of the screen there will be a hint noting the partition that was detected by the program.
Select the partition you want to work on and then press ENTER to proceed.

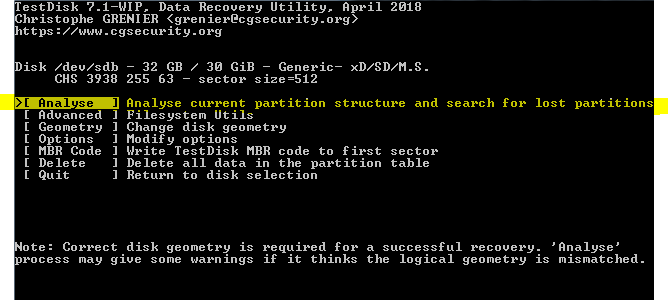
6. Performing Options
The next screen will provide you with a list of options on what you want the program to do with the selected partition. Because we are using this program to recover data, our selection would be ANALYSE.
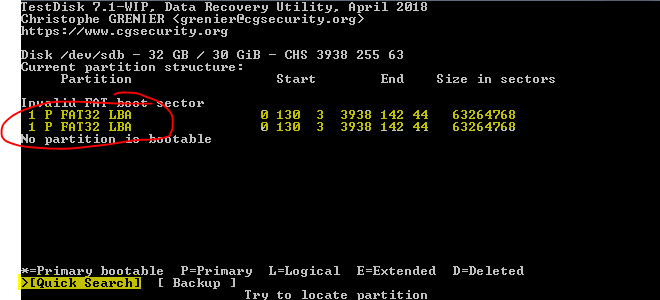
7. Quick Search
After selected ANALYSE, your next screen will offer up to two different mentions of the same partition. When this happens it verifies instantly to you that the SD Card is corrupt. Your only option at this point is to select the Quick Search near the bottom of the screen.
This function will do a quick search on any primary, logical, extended or deleted partitions.
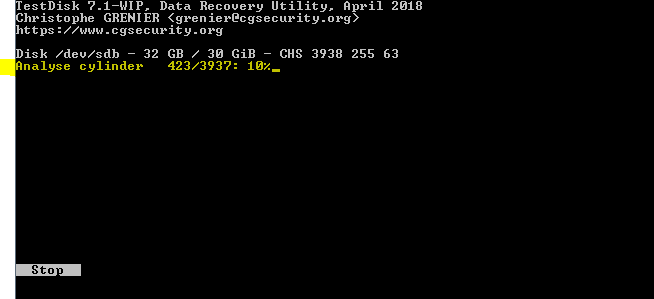
Once you select Quick Search a screen will appear that will show you the progress of that search. It will show you the required partition and that the search (once completed) has reached 100%.
Following the search, you may still not be able to find the required partition. If that is the case, you will need to perform a Deeper Search. However, if the required partition is located from the Quick Search, you can skip ahead to Step 9.
Back to what to do if the required partition is not located in the Quick Search. Just hit ENTER and the Deeper Search function screen will be revealed.
8. Deeper Search (if required)
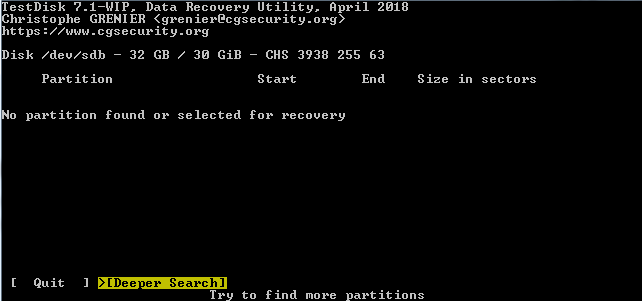
Essentially a Deeper Search operates in much the same manner as the Quick Search only it will perform a deep sector-by-sector scan in order to locate available partitions. To get the Deeper Scan to start, just press ENTER and watch the scan count up to 100% completion.
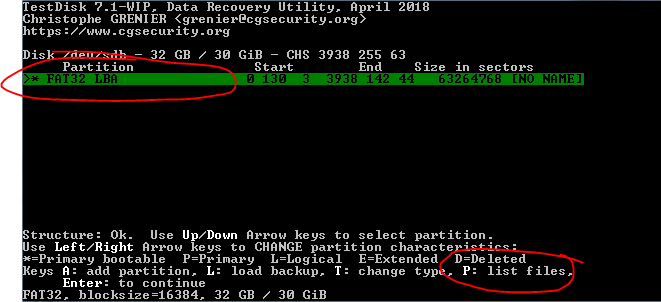
9. Found Partition
Whether you used the Quick Search or had to utilize the Deeper Search, once either process is completed correctly you should see your partition noted on screen. As soon as it shows (highlighted in green), you can list the files. In order to do this, which should be a prompt at the bottom of your screen, just enter “p” on your keyboard.
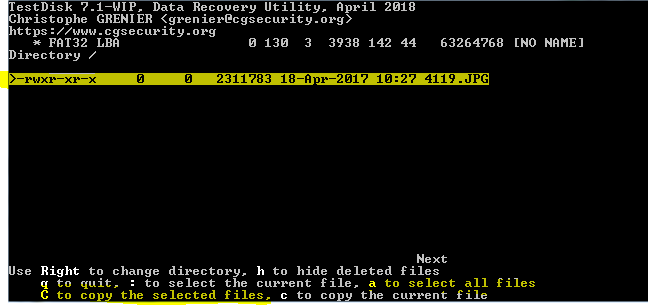
10. Available Files
After pressing “p” you will see a list of all files or folders that are on the SD Card you are trying to recover. All you do now is navigate to the folder(s) or file(s) you want to recover and press ‘a’ on your keyboard. That will select all of them, and then you would press “c” in order to actually recover the data.
If your intent is to just recover a single file or folder, do not press “a” and just press “c.” When you do this, the program will save only the file you have selected.
Select the folder on your computer you wish these files to be saved in and press ENTER.
In this screenshot, I chose to save the file in the folder the data recovery software was in after archiving just to make it easy to find later.
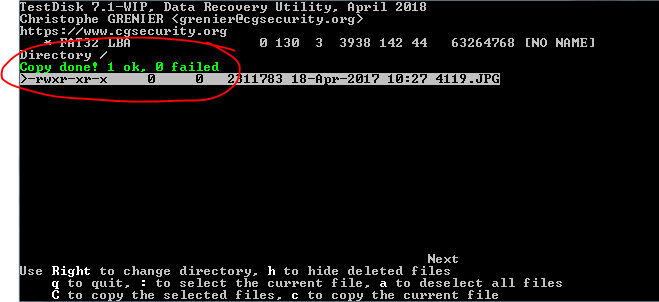
11. Copy Confirmation
The data recovery process ends here with a confirmation notice of the recovered file(s).
If you do not see the confirmation message, it could mean that something happened along the way. To be sure, repeat the entire recovery process carefully from the beginning.
In Conclusion
I hope this tutorial was helpful to you. I also hope it was just what you needed to recover data without having to spend large amounts of money on a lab that could potentially take advantage of you.
If this tutorial was helpful, I would appreciate it if you would share it with others through your social media channels and feeds.
Thanks and good luck!