Believe it or not, phone forensics is not the kind of work that requires CSI credentials. In fact, if you have the right tools and a bit of basic computer knowledge, you can do this. If your goal is to either recover data from the internal memory of your phone or you just want to have a backup in the form of a binary (sector by sector) clone, the following will be your go-to tutorial. Please share this with your friends and give our social media page a like.
Step 1 – What You Need – Required installations on both your phone and computer.
A – Rooted phone. If KINGROOT won’t work on your device, here is a tutorial on how to root your phone with ODIN software: (How to ROOT Samsung Android Phone via Odin). This step has to be completed before you attempt to recover any data from your phone’s internal memory. No exceptions.
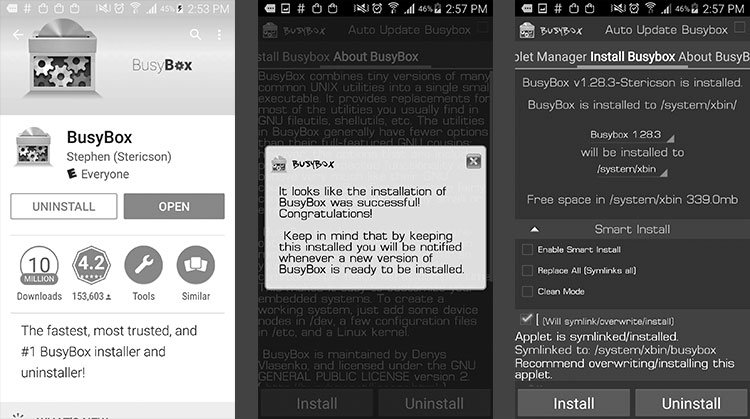
B – Install BusyBox on your device. All you do to find it is open the Play Store on your phone, search for and download the most up-to-date version of the BusyBox app. Install it and then open the app on your phone and install it again inside the app. It won’t work if you don’t do this. When asked, grant permissions noted for ‘superuser’ as you will be asked on the screen.
C – Download and install CYGWIN from and depending on your operating system, you will need either setup-x86_64.exe or setup-x86.exe. When you install be sure to install the file in C:/Cygwin. Although it should just go and install here by default, it doesn’t hurt to be sure. After the installation is completed, open the folder and confirm that the “bin” folder exists inside. You are not quite done with Cygwin at this point because you still have to install the missing PV libraries for Cygwin that can be downloaded from (Download Missing Libraries) There are two files in particular that you will need. They are pv.exe and pv.1.gz. Download both and put them in the following directories:
pv.exe → to c:\cygwin\bin\
pv.1.gz → to c:\cygwin\usr\share\man\man1\
D – Download and install ADB on your computer. Go to XDA Developers page and download the ADB zip file for Windows. After the download completes, extract the contents of the archive and put it in the “bin” folder you looked for earlier in the Cygwin folder. After the files are extracted, go back one directory and create a “nexus” folder. You should be creating the “nexus” folder in the main Cygwin folder and it should show up like this: C:/Cygwin/nexus. Confirm that this folder has in fact been created before moving forward. Without the “nexus” folder you will not be able to extract the internal memory image from your phone.
E – Download NETCAT (netcat 1.11) and put the contents of the archive in the “bin” folder that is sitting inside your Cygwin folder.
F – This is now the time for you to enable the USB Debugging mode on your phone. You can do that by following the instructions you will find here: How to enable debugging on android phone.
Step 2 – You Are Now Ready for RAW Image Extraction
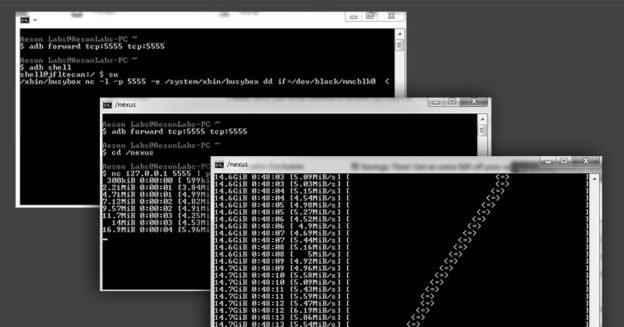
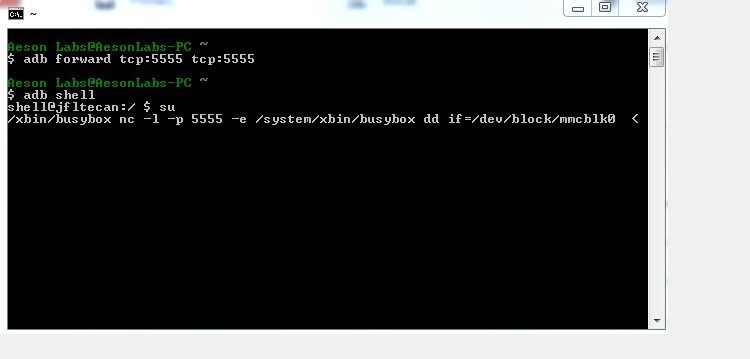
Alright! Let’s open the Cygwin folder and open the Cygwin.bat file and enter the following commands (be careful to get these exactly right):
adb forward tcp:5555 tcp:5555
adb shell
su
/system/xbin/busybox nc –l –p 5555 –e /system/xbin/busybox dd if=/dev/block/mmcblk0
Once you finish entering all these commands manually, don’t expect a lot to happen because all you did was open the ports for the transfer. You can leave that window alone now as you won’t need it again. Just don’t close it.
*** Important Note
Sometimes BusyBox installs in “bin” instead of “xbin” and so you should double check by opening the BusyBox app on your phone and the exact installation directory will give you the actual location. That’s actually not a problem as it just means you have to alter the commands slightly. So, this means that if BusyBox is in bin, then bin is used in the commands. If BusyBox is in xbin, the commands have to use xbin.
The first set of commands noted above was for an xbin location. Here’s what you need to enter for a bin location:
adb forward tcp:5555 tcp:5555
adb shell
su
/system/bin/busybox nc –l –p 5555 –e /system/bin/busybox dd if=/dev/block/mmcblk0
Okay, now you should open another instance of Cygwin.bat. Don’t worry if you see two Cygwin command windows running, because that is what you are looking for.
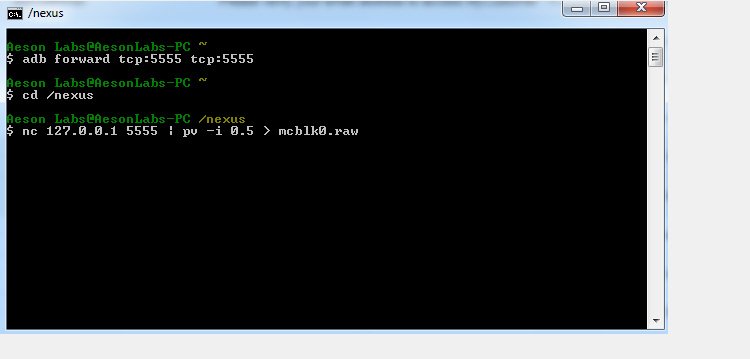
Now enter the following manually:
adb forward tcp:5555 tcp:5555
cd /nexus
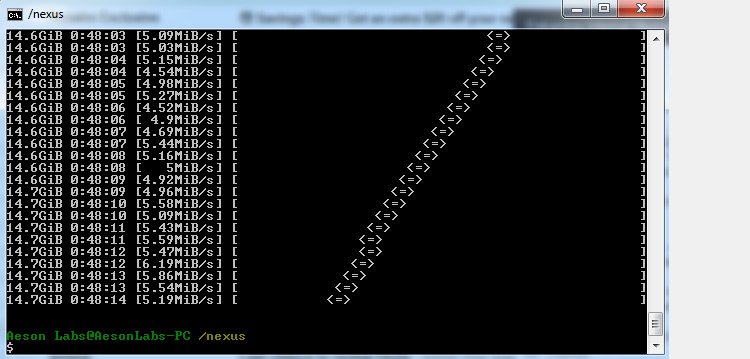
nc 127.0.0.1 5555 | pv –i 0.5 > mmcblk0.raw
Alright! You got this far. If you entered all the commands correctly, the second Cygwin window where you just entered the last set of commands should start to show you something. What you will see is the extraction process. Don’t worry if you don’t see it instantly because the capacity of your phone will have an impact on this. For example, a 16GB phone is going to take about an hour to complete the transfer. If the capacity is twice that, expect the process to take about two hours.
Sooner or later you will be able to see a RAW image file inside the “nexus” folder. When you do, you know the process is complete.
My next blog is your next step in the process. In it, I will cover how to mount that image and use it as a virtual disk on your computer so that you will be able to recover data from it.